
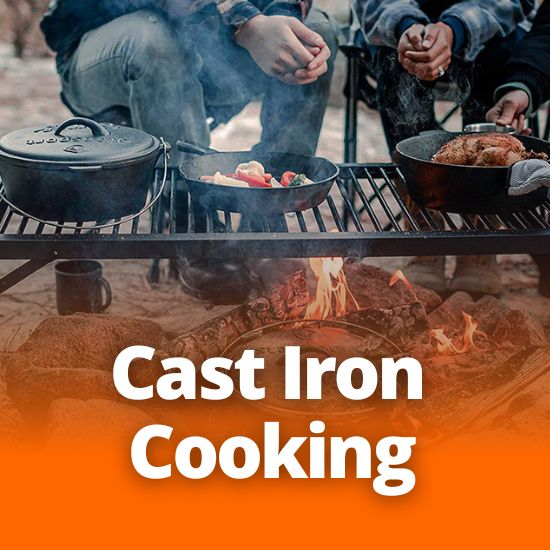
Cooking’s Generational Champion - Cast Iron!
Cast iron is one of the best staples you can have in your RV kitchen. Cast iron cookware was developed long before modern gas or electric ovens and stoves were even a dream and were made with the intention to withstand high heat from a direct source, like flames or coals. These days cast iron is used on stoves, in the oven, or over a fire and when treated properly will last ages!
Cast iron cookware is made by pouring molten iron into a mold, resulting in a heavy-duty piece that conducts heat extremely well. Because of this conduction ability you don’t need to have it over direct heat to work and will retain heat even if set near hot coals. Their durability means that where a modern non-stick or stainless-steel pan can last you a few years, they will wear down or be damaged more easily but with a cast iron you don’t have these worries and they’re easy to clean; just scour them and wipe them clean for your next meal!
However, their weight does mean they may not be the best options for backcountry camping or backpacking because they do have a good amount of heft to them, great for RV and trailer campers, not so great for tenters.
A cast iron pan can be used to make a variety of different meals, here are just a few quick recipes to introduce you to the modern-old-fashion cooking champion of generations. Also, to make this easier, we recommend using a campfire grate to cook with a cast iron over a fire.

Camp Doughnuts
You know those little doughnuts you’d get at summer fairs? Tossed in cinnamon and sugar, hot and melt in your mouth delicious. You can have those at camp with a cast iron pan!
Ingredients:
- 1 can biscuit dough
- 1-2 cup vegetable oil for frying
- 1 cup sugar
- 1-2 tbsp. cinnamon
Instructions:
- To save on storage space, mix your cinnamon and sugar in a gallon-sized ziplock bag at home before heading out.
- At camp: Heat your oil in a cast-iron skillet on your camping stove (keep kids and pets away; avoid being near an open flame with oil so we don’t recommend making this over a fire). Using a knife or food-safe scissors, cut each of the biscuits into fourths. So, if your container says it makes 8 biscuits, you’ll have 32 small doughnuts
- Place doughnuts into hot oil and cook 15 – 30 seconds per side, depending on oil heat.
- Remove the doughnuts from the oil when golden brown on both sides with a metal slotted spoon or tongs (don’t use rubber or plastic!).
- Place on a paper towel to absorb any excess oil. While the doughnuts are still hot, place them into the cinnamon and sugar blend in the ziplock bag and toss/shake to coat. Serve hot!

Cast Iron Breakfast Hash
A simple yet filling meal, this breakfast staple comes together for an easy, satisfying meal. Better yet, don’t like one of the ingredients listed? Substitute with your favorites and make it your own!
Ingredients:
- 2 Tablespoons olive oil or other light cooking oil (grapeseed, avocado, etc)
- 4 cups cubed red potatoes, unpeeled
- 1 bell pepper
- 1/2 a yellow onion
- 1 zucchini
- 3 cups baby spinach
- 1 teaspoon garlic salt
- 1/2 teaspoon Kosher salt
- Fresh black pepper
- 4 eggs
- 1/2 pint cherry tomatoes, quartered
- 1 bunch fresh chives, chopped
No Bull Tip! Prep your veggies before leaving for camp and put them in a sealed ziplock to stay fresh until you’re cooking! Recommend waiting to chop up your softer veggies like tomatoes or zucchini at camp, as those will last longer in the fridge or cooler without being cut up.
This recipe can be made in the oven, on a camp stove, or over hot coals. Just watch carefully as the varying heats will affect your cooking time.
Instructions:
- If using an oven, preheat it to 425 degrees.
- Heat oil over medium heat in a large cast iron skillet
- Add potatoes, toss to coat with the oil, cover the skillet, and cook for 10 minutes or until starting to soften. Stir them occasionally to prevent burning.
- Chop the onion, bell pepper, and zucchini into bite sized pieces (do this before you leave for camp for most veggies as noted above). After the 10 minutes are up, uncover the skillet and stir in the onion and pepper. (If using a stove: Turn the heat up to medium-high) Cook for another 10-12 minutes or until potatoes are softened and vegetables are golden brown.
- Stir in the zucchini and spinach and cook until spinach is wilted, about 2 minutes. Sprinkle mixture with garlic salt, salt, and black pepper and stir to disperse evenly. Make 4 small wells in the mixture and crack an egg into each one. Either place the skillet in the preheated oven to bake or cover and cook until whites are set but centers are still runny, 5-7 minutes.
- Remove the skillet from the heat, toss the grape tomatoes and chives on top, and serve.
Note: No lid? Use tin foil! Just be careful when tucking it over the sides of the pan and use oven mitts!

Campfire Cast Iron Pizza
You don’t need to have a culinary degree to make a delicious pizza at camp! Using premade pizza dough makes this a super convenient meal that can be as simple or elaborate as you desire!
Now the true question: Are you a pineapple pizza lover or hater?
Equipment:
10” or 12” cast iron skillet with a lid OR use aluminum foil in a pinch
Ingredients:
Pizza Base:
- 1, 10″ or 12″ pizza dough (NOT pre-cooked, dough should be “classic” style, not thin-crust)
- 1 tablespoon olive oil OR use spray oil (you’ll need a pastry brush if using oil)
- ¼ cup tomato sauce (use more or less depending on the size of your pizza)
- Approx. 4 ounces of shredded, low-moisture mozzarella cheese (or more if you’re a cheese lover)
Toppings: Use about 1 cup of toppings for each pizza. Here’s a few ideas:
- cherry or grape tomatoes, sliced in half
- mushrooms, thinly sliced
- bell peppers, julienned
- olives, sliced
- hot peppers, sliced
- fresh spinach
- fresh basil
- crumbled or sliced (cooked) Italian sausage (you can also use leftover breakfast sausages)
- sliced pepperoni (as mild or hot as your want)
- parmesan cheese
- pineapple and ham
- drizzle of honey (I personally love a cheese pizza with a drizzle of honey and some fresh-cracked black pepper *mwah*)
No Bull Tip! Slice up any firm veggies (peppers, mushrooms, etc.) and shred your cheese at home before you leave for camp.
Instructions:
- Heat your coals until they are very hot, or let a campfire burn down until the wood is smoldering but without active flames. This will allow for the easiest cooking control.
- While the coals are heating, trim the pizza dough to roughly the size of the cast iron pan.
- If your cast iron pan is not well-seasoned, brush or spray it with oil. If it is well-seasoned, you can skip this step.
- Brush or spray both sides of the dough with oil. Press the dough into the bottom of the pan, folding over any excess dough and pressing it down firmly to avoid your dough from splitting during cooking. Unlike a regular pizza, you’ll be flipping this dough to cook both sides so try and keep it fairly even.
- Place the pan onto the campfire grate. Cook for about 4 minutes, or until the bottom side of the dough begins to brown and crisp up.
- Cook time may vary depending on the temperature of the coals or fire, and the thickness of the dough. Watch for the browning dough to know when to flip. Tip: Use metal tongs to pull the edge of the dough up and check for doneness.
- While dough is cooking, prepare your toppings (this can also be done before you leave for camp).
- Remove the pan from the campfire grate. Note: The cast iron handle will be very hot at this point. Use an oven mitt to protect your hand.
- Once off the heat, flip the dough, placing the cooked side on top. Spread the tomato sauce over top, leaving a small border around the edge for the pizza crust. Top with mozzarella and desired toppings.
- Cover the pan with a lid or foil. Remember the pan will still be hot so use an oven mitt to fold the edges of your foil down.
- Return your pan to the campfire grate. Cook covered for approximately 6 minutes, until the cheese has melted and any veggies are softened. Remove the lid, and cook for another 2 minutes, until the excess liquid from the veggies has cooked off.
- Cook time may vary depending on the temperature of the coals or fire, how small or large your pieces of mozzarella were shredded, and the amount and type of veggies used. Note: If your veggies have released a lot of liquid, tilt the pan and any excess liquid should immediately burn off when it hits the hot cast iron.
- Remove the pan from the fire and move it onto a cutting board. Allow it to cool slightly before cutting and serving. If desired, begin cooking another pizza.
This recipe makes 1 – 10″ or 12″ pizza, depending on the size of your pan. Plan on serving 1 pizza for 2 people, or 1 pizza per person if you’re serving some very hungry hikers.
Remember to always observe proper fire safety procedures and keep small children and animals away from any open flames or hot pans.
Watch our blog for more cast iron recipes in the future!