
Campfires 101
Hollywood makes it look so easy, a couple logs, a match, and boom! Fire – perfect as far as our ancestors were concerned and still perfect for campfire stories or all kinds, whether spooky or wholesome
But as many angsty teens can attest, it can be a bit more complicated than just throwing a match on a pile of wood.
How to Start a Fire
Basic Elements:
Fuel: The large pieces of wood that keep the fire going. Live materials won’t burn so don’t go cutting down living trees or chopping off branches. They won’t burn and you’re only damaging the forest.
Kindling: Small sticks, less than 1” in diameter or shingle wood, as examples.
Tinder: Small twigs, dry leaves, old newspaper, corn chips. Generally dry, flammable material to help light the fire. This is used as the base of your fire and is placed in a loose pile in the center of where you’re building your fire.
Fire starters: You can buy commercially produced fire starter squares or oil sticks, but can easily make your own as well. We’ve listed a few:
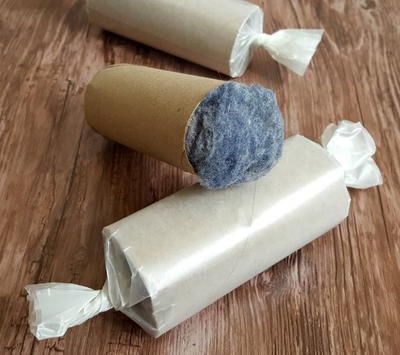
- Toilet Paper Tube:
Fill an empty toilet paper tube (or a paper towel tube cut in half) with dryer lint and wrap it in wax paper (not parchment).
Use a match or lighter to light one end and place it in your fire
- Corn Chips:
Not only can you grab these at every gas station, but they can help you get the tinder going in a pinch.
- Cotton pads dipped in wax:
Dip a cotton pad in wax (such as paraffin or candle wax) and it will work similarly to the dryer lint kindling.
There are also dozens of different fire formations to choose from, each with different pros and cons. We’ve gone through a few step-by-step for you!
There are also dozens of different fire formations to choose from, each with different pros and cons. We’ve gone through a few step-by-step for you!
Get Started: Prepare your fire pit, making sure the surrounding area is clear of flammables and you have a source of water, a bucket, and shovel nearby in case of emergency.
No Bull Tip! Putting out a fire with water will cause smoke, dousing the fire with dirt will smother the flames with less to no smoke.
Classic Tipi: Not always great for cooking unless you have a tripod, but perfect for campfire stories and s’mores.
How to: Place your kindling over your tinder pile like a tent, creating a roughly conical shape, sticking the bottom of the kindling pieces in the ground and leaning the tops together to build the structure. You can build this up in layers, larger fuel pieces can be placed around the base. Be sure to leave spaces to allow airflow.
This version burns fast and hot but doesn’t last longer than a few hours so isn’t great for extended cooking.

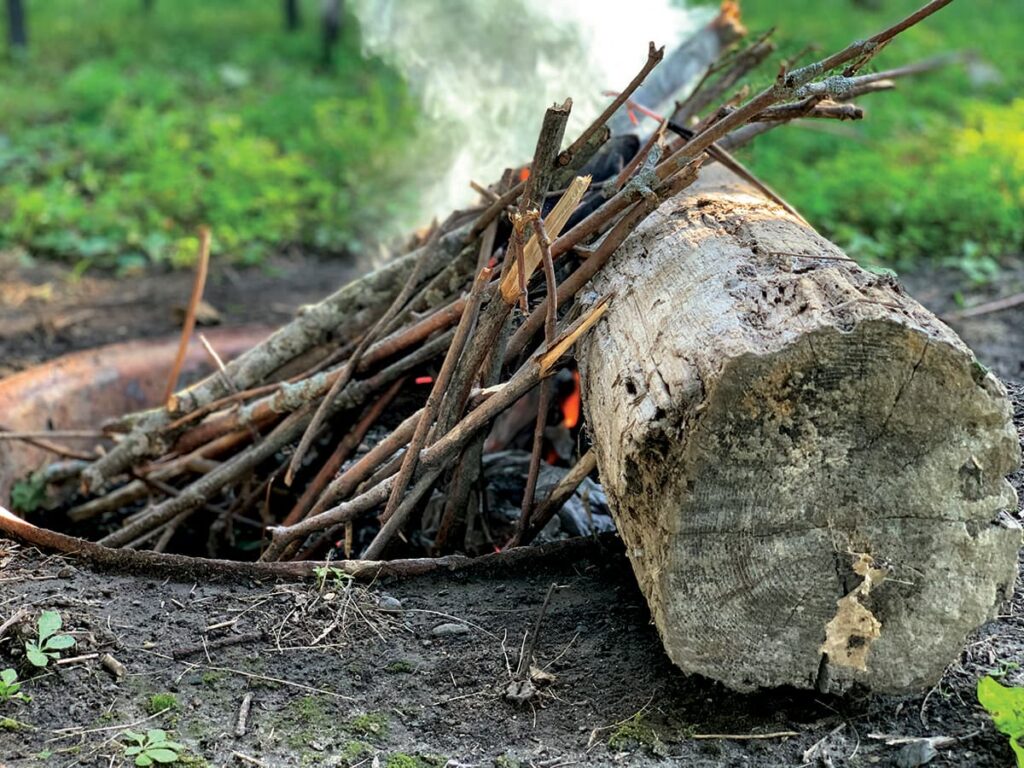
Lean-To: Easy to do, good for windier days, can be made small for backwoods camping.
How to: Lay a large log piece down on the side of your fire pit where the wind is coming from. This will shelter the fire on the downwind side. On that sheltered side place your tinder and some kindling, then begin by adding rungs of kindling leaning up against your large log piece like a sideways ladder. You can add larger wood pieces on top of this but be sure that you aren’t smothering your tinder pile and will allow enough air for the fire to burn.
Light the fire from the ‘entrance’ of the structure, once the tinder has caught the rest of the fire should burn from here. Feed this fire by continually adding wood to the lean-to against the log, being sure to allow good airflow. This version isn’t great for long-term cooking but can give you some warmth, enough to heat up a kettle of water or a quick meal. They’re also great to work from if you’re planning to build up a larger fire later.
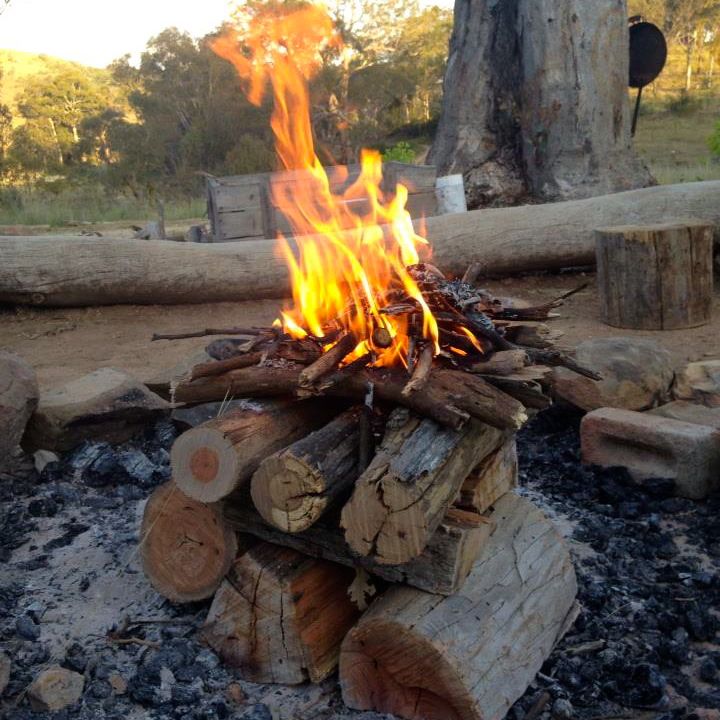
Log Cabin: Easy set-up, can be built up after a teepee has collapsed and great for cooking.
How to: It is important you use a lot of kindling for this fire so make sure you’re prepared! Place a large pile of kindling and tinder in the center, follow that by laying a log on each side so they’re parallel. Your next pieces of firewood will cross this base on either side, leaving the kindling uncovered in the middle. This second layer may have one or two pieces on either side, just make sure they’re of equal diameter and size.
The third layer will again cross over the same way as the base but this time covering the gap over the kindling. Repeat this process a few times, being sure you’re leaving space between each wood piece you lay down to allow good airflow throughout.
You’ll end up with a roughly cube like structure and tossing a match down into your kindling (or a lit starter) will start your fire. After about ten minutes you should have a substantial blaze going.
As this fire burns it will slowly fall in on itself, creating a bed of coals (great for cooking), extra kindling can be added to extend its burn time just drop it down the middle when holes appear.

Upside Down: Reverse how you build your fire; we’ve been doing the tinder, kindling, fuel – this style flips that on its head, literally.
How to: Start with your large logs on the bottom, stacked close together with no spaces, then the second layer of logs across the top (similar to stacking the log cabin but without spacing to get a cube shape). Add another layer, this time of smaller logs, again alternating the direction. If you have a really big fire pit or fireplace you can repeat this sequence a few times to get an appropriate size for you. Once you’ve got an appropriate height, put down a layer or two of kindling and tinder then your firestarters.
This set-up can give you a longer lasting fire that gives off a lot of heat. With the way the wood is stacked it should also require minimal management or feeding and last 3-7 hours depending on the amount of wood you use. It will take longer to create larger flames and patience is key – it might not look like much is happening for the first 20 minutes.
Important note! Slightly elevate your firestarters off the layer below, without this it can be difficult for any paper or thinner pieces of tinder to catch.
Wooden Rocket Stove: This set-up can make for a great camp stove, and when it gets going you’ll see where the ‘rocket’ name comes from. There are a couple different versions of this format, but we’re focusing on the basic drill version.
About drills: You’ll want an auger drill bit of 1-inch diameter, around 6-inches in length. You can definitely use a larger drill bit, but remember that the more wood you remove the less is left to burn. Manual or electric drill doesn’t matter as long as it works for you.
How to: Grab yourself a large, round, dry seasoned log and some tinder. An appropriately sized log should be a foot or so long, and around a foot in diameter. The key is old, dead, and dry – living or fresh cut wood will not work for this one. Your cut ends should be as flat and even as possible to keep it steady.

Now bring on the drill! Your log should be resting on one cut side as you drill a hole down the center of the other cut end, about halfway down your log in depth. Before removing your drill bit, mark where you’re at with a pencil or washable pen on the bit to measure just how far your final depth is. Placing your bit along the side of the log will then make it easier to measure where to drill the second hole. This one will go in horizontally to meet up with the vertical hole at an approximate 90-degree angle.
Clear out debris and add your tinder so it collects at the meeting point of the two holes, but don’t pack it tightly or you’ll lose airflow. Light the tinder from the side hole, the idea being that air is drawn in from the side and heat comes from the top (flames too, so be careful of what you have above it). This may take some patience to light, so stoke your fire until the inside of the log catches and begins to burn.
Once it’s burning you can place three stones on top to set a pot on to cook without smothering the fire.

Dakota Fire Pit: Unconventional, low-fuel required, great for Leave No Trace. A bit labor intensive, but burns hot and great for windy days!
This one requires you to dig, but it’s best for when you’re backpacking or in the backwoods. Do note that certain parks may not allow you to dig out a hole to make a fire so be aware of regulations wherever you are.
How to: Pick your space for 2 holes, both around a foot in diameter. One hole will be for the actual fire, the other will act as your chimney. Make sure you clear away any flammables like dry leaves, pine needles, etc.
Dig out your fire hole first to your preferred size and depth, for this version we’re sticking with the 1-foot diameter and 1.5-foot depth. Dig the second hole around a foot away, and it doesn’t have to be as big as the first. Digging this one at an angle will make it easier to connect them later but don’t do that straight away. This is because you want the tunnel connecting them to be smaller, about the size of an adult fist so 4-5 inches wide. You’ll probably have to get on your hands and knees to dig this one out. You’re creating a passage for airflow but not for the fire to creep out of its holding pit.
No Bull Tip! Changing the depth and size of your fire hole will affect the size of your fire. A deeper hole means less visible light, a wider hole means a bigger fire.
That’s the major work done, lighting the fire is the same as the rest. Gather your tinder and kindling in the fire hole, being sure not to block the tunnel to the chimney with larger pieces. Once you’ve got a blaze started you can feed the fire with larger sticks that will burn slower. And voila! A fire pit that you won’t have to worry about the wind putting out.
No Bull Tip! This fire type should not be used during times of extreme drought as they can cause fires underground, and aren’t able to be used in every environment, such as rocky, sandy, or root filled soil.
Watch out for more campfire tips in the future!